If you’re looking to install a metal roofing, you’ll need the help of a professional. A metal roofing system is a reliable and long-lasting solution for your home, and it can be a big investment.
In this blog post, we’ll provide you with instructions on how to install a metal roofing system yourself step-by-step. Keep on reading to know!
Step-to-step Guide for Metal Roofing
Measure Your Roof
For the installation of metal roofing to be successful, measuring your roof is an essential step. Start by multiplying the length by the width to determine the total square footage of the roof’s surface.
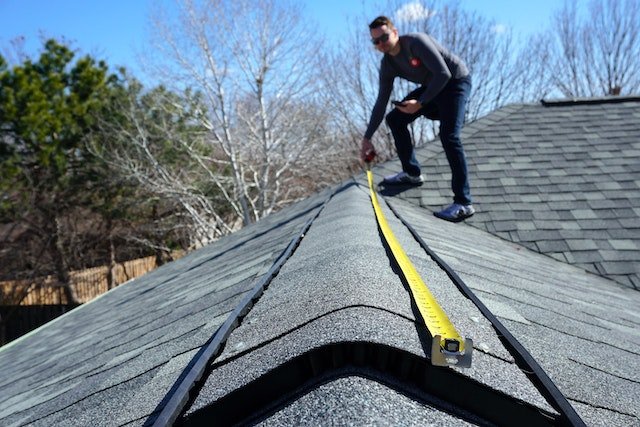
Any locations with intricate roof shapes, such as valleys, dormers, or hips, should be noted and measured separately. Measure the roof’s height and pitch as well, taking into account overhangs and eaves, and make sure to precisely record the figures.
It’s essential to be as accurate as you can with this information because it will be used to order the proper quantity of goods.
Calculate the Slope Factor of Your Roof
Measure your roof’s height and horizontal distance, then divide the two values to get the slope factor. You will receive the roof’s pitch in inches per foot after doing this. The slope factor can then be determined using this knowledge and a roof pitch chart.
In addition to providing efficient drainage and water movement off the roof, the slope factor is crucial in calculating the number of materials required for the construction of metal roofing.
Get Your Materials
It’s essential to gather all the necessary supplies for a good installation before beginning the installation process. These components normally consist of trim, fasteners, flashings, underlayment, metal roof panels, and any other hardware that may be required.
To accommodate for waste, cuts, and overlaps, it is advised to buy more materials than are required. The type of metal roofing is placed must also be taken into account since some may need certain equipment and supplies.
Make sure you have access to all necessary gear, including a ladder, a drill, and metal-cutting snips. Before beginning the installation, make sure all the supplies and tools are ready to go. This will guarantee a quick and easy operation.
Prepare a Work Site
An essential initial stage in the procedure is preparing a work site for the installation of a metal roof. This includes cleaning up any trash, getting rid of any outdated roofing materials, and making sure the surface is stable and level.
Additionally, it’s critical to check that access to water and electricity, as well as the roof, is appropriate. Make sure you have all the required equipment and supplies, such as metal roofing panels, screws, and sealant, before starting the installation.
Also, take into account the weather, as metal roofing shouldn’t be put in extremely hot or windy situations.
>> Best Roofers in Teaneck Area
Remove the Old Roofing
Start by removing any roofing components, such as shingles, felt paper, and flashing, before removing the existing roofing. After that, take out any nails or other fasteners with a flat bar.
Use a pry bar or hammer to dislodge any old roofing material that is adhered to the decking before removing it. The decking, which will serve as the foundation for the new metal roofing, must be protected from damage. Make sure to protect your lawns while removing and preserving the old roof materials or scrap.
Examine the decking for decay or damage, then properly dispose of the old roofing materials. Before putting in the brand-new metal roofing, make any necessary repairs.
Repair Any Damage
It’s crucial to fix any damage to the roof deck before putting on a metal roof. This includes patching up any holes, cracks, or rotten sections in the decking and, if required, strengthening it.
Make sure the decking is strong and in good condition so that the metal roofing panels have a stable base.
Additionally, check the roof deck’s edges and corners to make sure they are square and straight, as doing so will guarantee a seamless installation of the metal roofing panels.
Add Your Insulation Layer
To increase energy efficiency and comfort, it is crucial to add an insulation layer before installing the metal roofing panels. Foam board insulation or fiberglass batts can be directly applied to the decking or purlins to achieve this.
To prevent movement under weather conditions, be careful to firmly connect the insulation to the decking. To avoid moisture buildup, think about employing a vapor barrier that faces downward.
It is essential to take the local temperature and energy code requirements into account when deciding on the kind and thickness of insulation.
Install the Edging
Edging installation is an important phase in the metal roofing process since it gives the roof a polished appearance and aids in holding the roofing material in place. Cut the edging to the proper length after measuring the roof’s perimeter.
After that, attach the edging to the eave with roofing screws spaced every 12 to 16 inches. Use a rubber mallet or roofing hammer to carefully tap the edging into place to ensure a snug fit. To stop water from entering and causing damage, be sure to seal any seams using roofing sealant.
Install Metal Panels
You must measure and cut the edge pieces to fit each metal panel in order to attach it to the panels. After applying a bead of sealant to the panel’s edge, set the edging piece on top, making sure it is perfectly aligned.
Finally, use screws or pop rivets to fasten the edging to the panel. Be careful not to harm the metal by drilling pilot holes first. For each panel, repeat this procedure until all of the edgings have been fitted.
Install Flashing
Flashing installation is an important phase in the installation of metal roofing because it helps to stop water from leaking into the roof structure. Flashing is often constructed around roof penetrations, such as vents, chimneys, and skylights, to create a watertight barrier.
It is typically made of metal, such as aluminum or galvanized steel. To ensure a durable, leak-free roof, it’s critical to select flashing that is suitable with the metal roofing material you’re using and to install it correctly using the sealant.
To guarantee a complete and appropriate seal, make sure to measure and cut the flashing pieces, so they fit snugly around each penetration and overlap with the underlying roof deck.
Finish Your Roof
Make sure to securely fasten all roofing panels, trim and seal any edges, install any required ventilation and penetration flashings, and add any finishing touches, such as drip edge or roof ridge cap, to complete your metal roof installation.
Additionally, check your work for any fasteners that might need to be tightened or sealed, clean up any debris from the installation site, and inspect your work. A well-finished roof will not only improve the appearance of your house overall but also guarantee that it will be protected from the elements for many years to come.
Common Metal Roof Installation Mistakes
Wrong Roof Measurements
Making wrong measurements of the roof is one of the most frequent errors committed during the installation of metal roofs. The improper amount of material may be purchased. As a result, resulting in waste and additional costs.
Accurate measurements can also have an impact on the roof’s overall appearance and operation, possibly leading to leaks and other structural problems.
To prevent this, it is essential to accurately measure the roof’s length, width, and slope, as well as to confirm these measures before placing a material order. It is generally advised to have a professional measure the roof for the best outcomes.
Not Using Underlayment
A common error is installing a metal roof without installing underlayment. A crucial element that serves as a barrier between the roof deck and the metal panels is underlayment. It offers an additional layer of defence against factors like wind, precipitation, and other things that can get through the roof.
Without underlayment, water can penetrate the roof and harm the structure, the insulation, and other parts of the building. Underlayment also contributes to a reduction in noise and an improvement in the building’s overall energy efficiency.
Therefore, it is crucial to choose underlayment of the highest calibre that is appropriate for the particular style of metal roofing system being installed. Failure to do so may eventually lead to expensive repairs and reduced performance.
Poorly Installed Flashing
One of the frequent errors in installing a metal roof is improperly fitted flashing. Flashing is a key element in preventing water from entering the roofing system and harming the structure of the building. Incorrect flashing installation can result in leaks and other problems like mould and rot.
Insufficient sealing, the use of subpar materials, and the wrong location can all lead to poor flashing installation. To ensure a durable, watertight roof system, it is crucial to make sure that flashing is placed by qualified experts who comprehend the significance of appropriate installation.
Using the Wrong Sealant
During the installation of metal roofs, using the incorrect sealant is a frequent error. In order to form a watertight seal between various roofing elements, including roof panels, flashings, and roof penetrations, sealants are utilized.
Using the incorrect kind of sealant can lead to leaks, adhesion problems, and other problems that could permanently harm your roof and, perhaps, your house.
It is essential to use the type of sealant the manufacturer recommends for your particular roofing material and to apply it according to their application guidelines. Your metal roof will last longer and perform properly if you use a suitable sealant.
Over or Underlapping Panels
During the installation of metal roofs, it’s typical to overlap or underlap panels, which can result in leaks and lessen overall roof longevity. In order to ensure a watertight seal between the panels and stop water from entering the building, proper panel overlapping is crucial.
In order to prevent water from flowing where it is most likely to, it is advised that panels overlap by at least 2 inches and that this overlap happens at the highest point of the roof.
Additionally, it’s crucial to watch out for excessive panel overlap, which might result in water infiltration and possible leaks. For a metal roof installation to be successful, panels must be properly overlapped.
Safety Considerations While Roofing
Begin With Your Pre-start Talk With the Co-Workers
It’s crucial to have a pre-start discussion with your co-workers before beginning any roofing work to make sure everyone is aware of the safety factors involved. This can involve going over how to use the equipment properly, pointing out potential roof risks, setting up communication channels, and going through emergency methods.
By having this discussion, you can reduce the possibility of accidents happening and make sure that the roofing job is successful and safe for everyone.
Wear Proper PPE
A crucial aspect of roofing safety is wearing the appropriate Personal Protective Equipment (PPE). For example, a hard hat, safety goggles, gloves, and non-slip shoes are included here. Hard hats shield the head from flying objects and the force of a fall.
Eyes are shielded from UV rays, dust, and other debris by safety glasses. Gloves shield the hands from grazes, scrapes, and contact with chemicals and roofing materials. On a slanted roof, non-slip shoes offer traction and stability to stop slips, trips, and falls.
PPE serves to protect the individual while also lowering the danger of injury and assisting in the safe and effective completion of the task.
Carefully Position Ropes and Extension Cords
Ropes and extension cords must be placed properly when working on a roof to ensure safety and avoid accidents. This includes tying ropes to strong anchor points on the ground or roof while making sure they are free from obstructions and jagged edges.
Additionally, extension cords should be placed so that they are shielded from tools and heavy foot traffic and do not present a tripping hazard. Ropes and extension cords should be positioned correctly so that tools and materials may be moved about the roof safely and effectively. This helps prevent falls and other incidents.
Use Guardrails
When roofing, guardrails are a crucial component of safety. To stop employees from falling from a roof, guardrails are barriers or systems that are put along the edge of the roof.
Guardrails should be strong enough to hold a worker’s weight in the event of a fall, and they can be made up of a rail, a toe board, and a mid-rail. In order to protect workers from catastrophic injuries and fatalities in the case of a fall from the roof, guardrail installation is a crucial step.
Guardrails that have been installed correctly can also give workers more assurance and peace of mind while they are working on a roof, allowing them to concentrate on the task at hand.
Be Careful of Slate and Tile Roofs
Roofing work on slate and tile roofs can be dangerous because of their fragility and high weight. When working on these roofs, it’s crucial to use caution and the right skills to prevent mishaps and harm to the roofing material.
Before beginning any work, it is advised to have a professional evaluate the stability of the roof and make sure that the appropriate support and safety equipment, such as harnesses, are employed.
In order to prevent breaking or to crack the materials, it is also advisable to limit walking on slate and tile roofs.
Avoid Working in Bad Weather Conditions
Avoiding working in bad weather is among the most crucial safety measures when roofing. For roofers, extreme weather conditions, including high winds, torrential rain, lightning, and hail, can increase their risk of mishaps like falls and electrical shocks.
Additionally, there is a higher chance of slips and falls when working on a damp or slick roof. These factors make it crucial for roofers to stay out of inclement weather and to carefully evaluate the situation before beginning any roofing work.
Rearranging the task until a day when conditions are safer is preferable to putting oneself or others in danger.
Tools Required For metal roofing
- Basic carpentry tools
- Turbo Shears
- Snips
- Metal Shears
- Nutsetters
- Hand Seamer
- Tripolymer Caulking
- Butyl Tape
- Aviation snips
- Drill/Driver
- Fall Protection
Materials Required For metal roofing
- Metal Roofing Panels
- Metal Roofing Sealant
- Roofing Nails
- Sidewall Flashing
- Gable Trim
- Eave Trim
- Outside Foam Closure Strips
- Inside Foam Closure Strips
- Ice and Water Shield
- Butyl Tape
- Roofing Vent Boots
- Self Tapping Roofing Screws
- Ridge Cap